A note on the subscription - my newsletter is still free for all, but I would encourage anyone who is reading to subscribe for $2/month. If you are a free subscriber you can change to paid by clicking the “subscribe now” link below.
Thank you for reading!!
I LOVE savory pies and hand pies. I grew up in Montreal across from a Chilean restaurant called La Chilenita (it moved, but it still exists!) and they make the best empanadas with a simple flour and water crust. The dough is sturdy enough to hold the filling and not fall apart, but thin and tender, too.
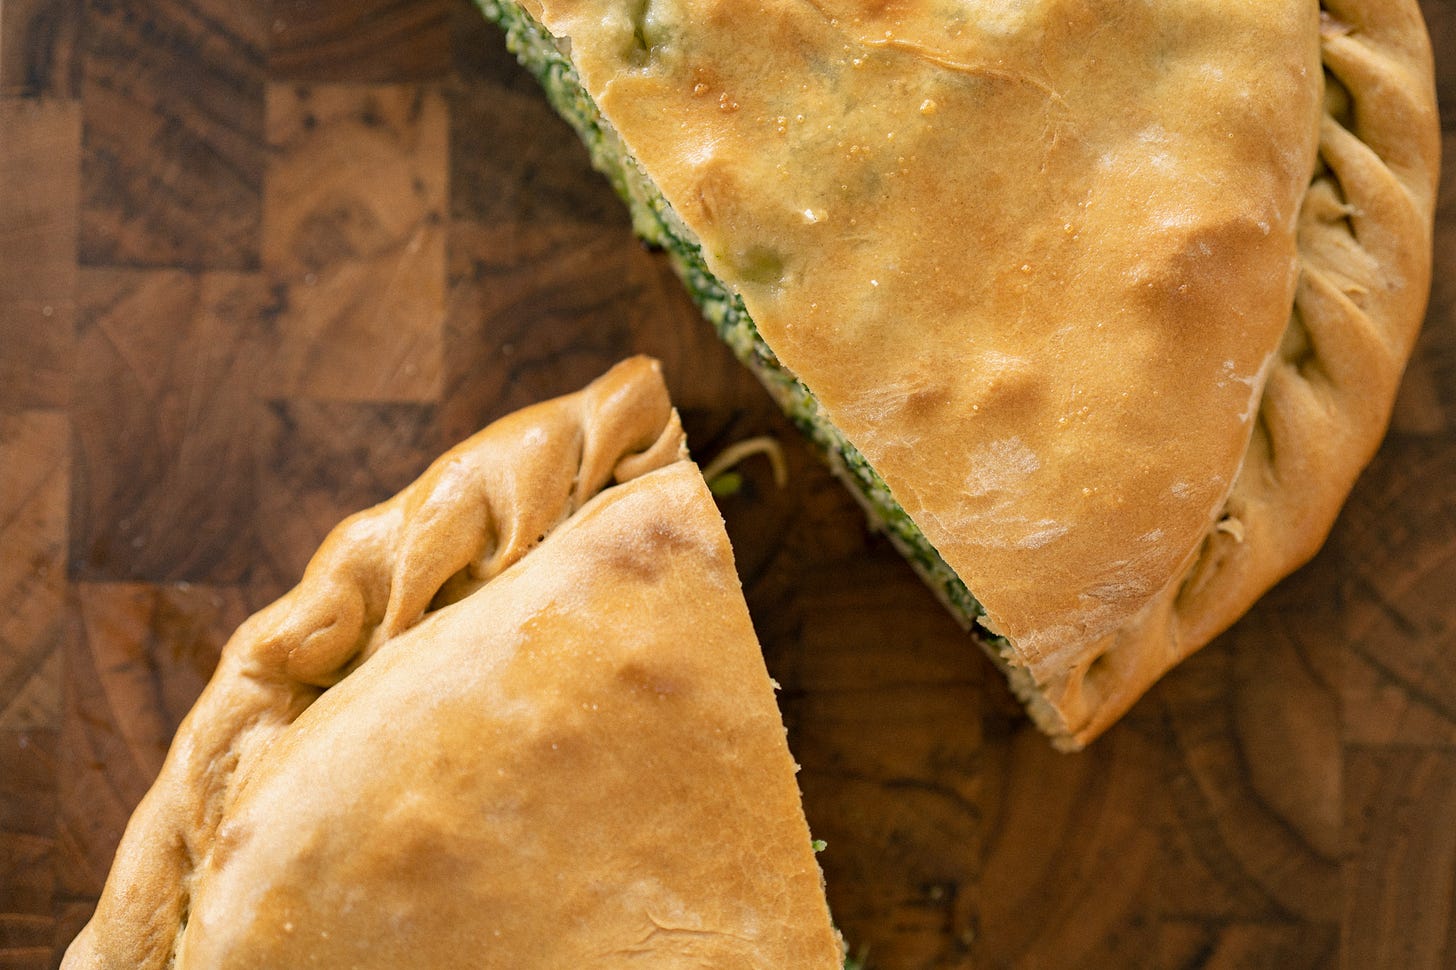
Then I visited Rome for the first time and discovered the torta salata (which translates to salty or savory cake), clearly a cousin of the Chilean empanada. It has a very similar flour and water crust and is typically filled with greens and ricotta. At Easter they add in a few hard boiled eggs and call it a torta pasqualina. On that trip to Rome I remember picking up a couple of slices of torta salata that were filled with mushy boiled broccoli and ricotta and ate them at room temperature on the plane ride home. Heaven!
Over the years I’ve developed my own version of the dough. I add a little olive oil and baking powder to help tenderize the typically tough flour and water dough. I love this crust filled with greens and ricotta, but you could take this in any direction - roast pumpkin with caramelized onions, leek and broccoli with blue cheese, or feta and spinach like my beloved empanadas from La Chilenita.
This also happens to be another great recipe for cleaning out your fridge - scallions, herbs, fennel, zucchini, any greens or odds and ends of cheeses can be turned into a most delightful filling. Feel free to play around with what you have on hand! The key is that your filling can’t be too wet or it will sog out the crust. Eggs will help to bind the filling, but so will squeezing out any excess moisture from the veggies.
I love to make this impressive dish for friends; it’s perfect to make ahead and best served at room temperature with a big salad on the side.
Photos by Ben Turner, whose work you can find here.
TORTA SALATA serves 6-8 people
dough:
375 grams (about 3 cups) all purpose flour
½ teaspoon baking powder
1 teaspoon kosher salt
4 teaspoons olive oil
1 cup room temperature water
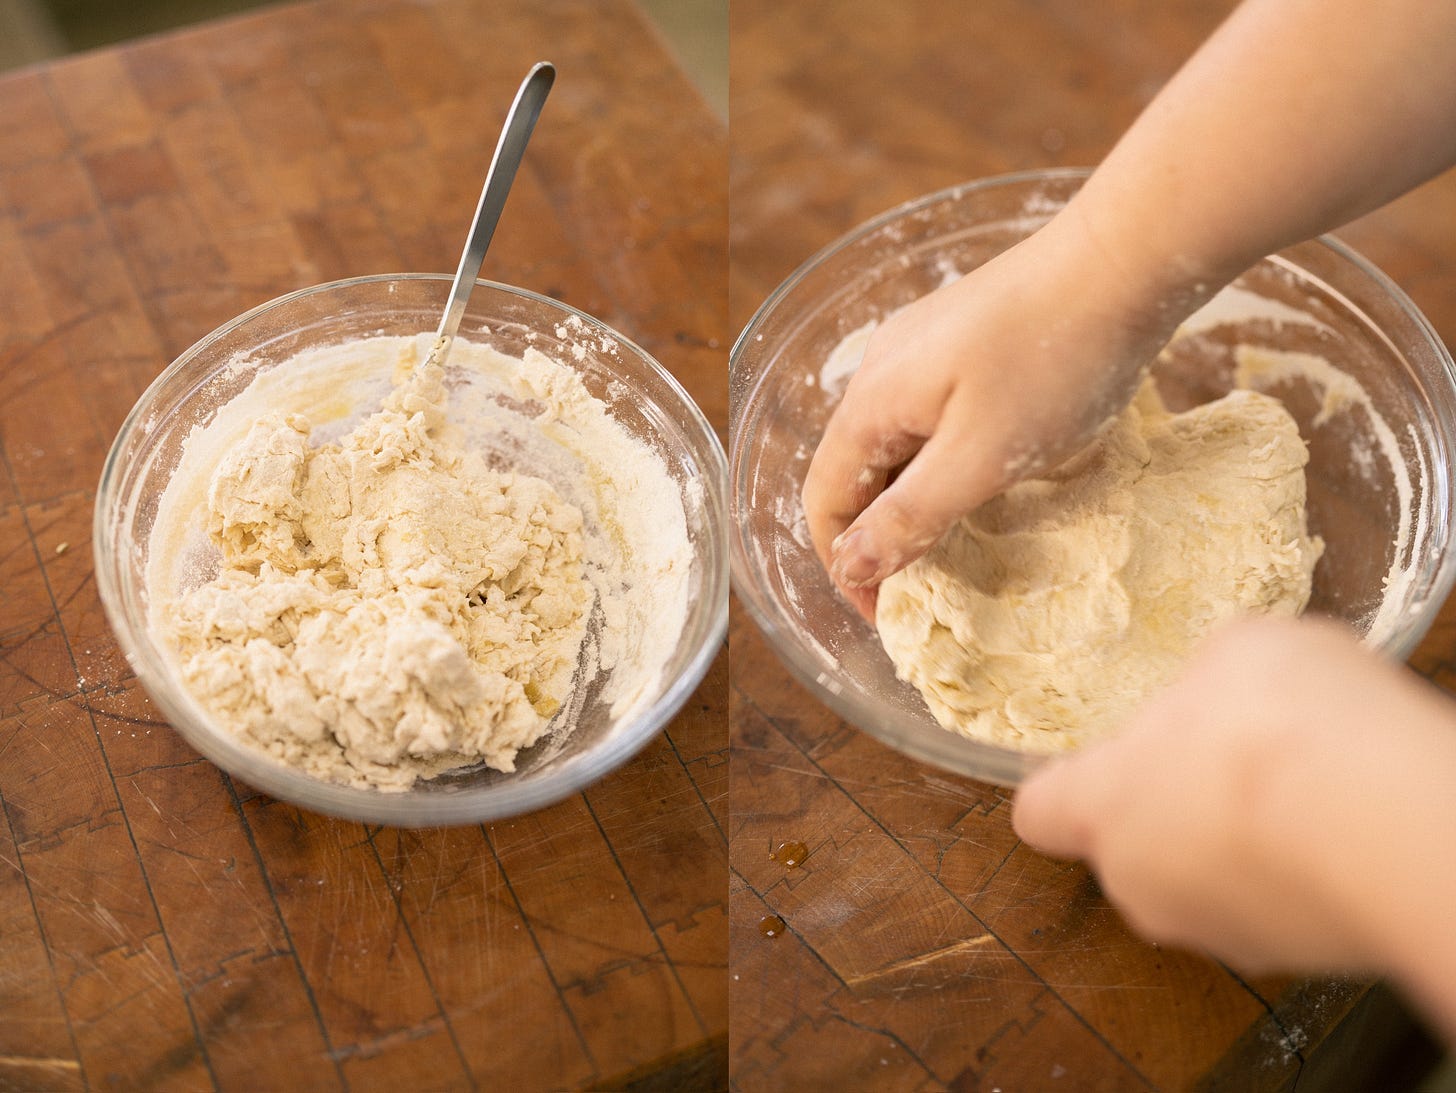
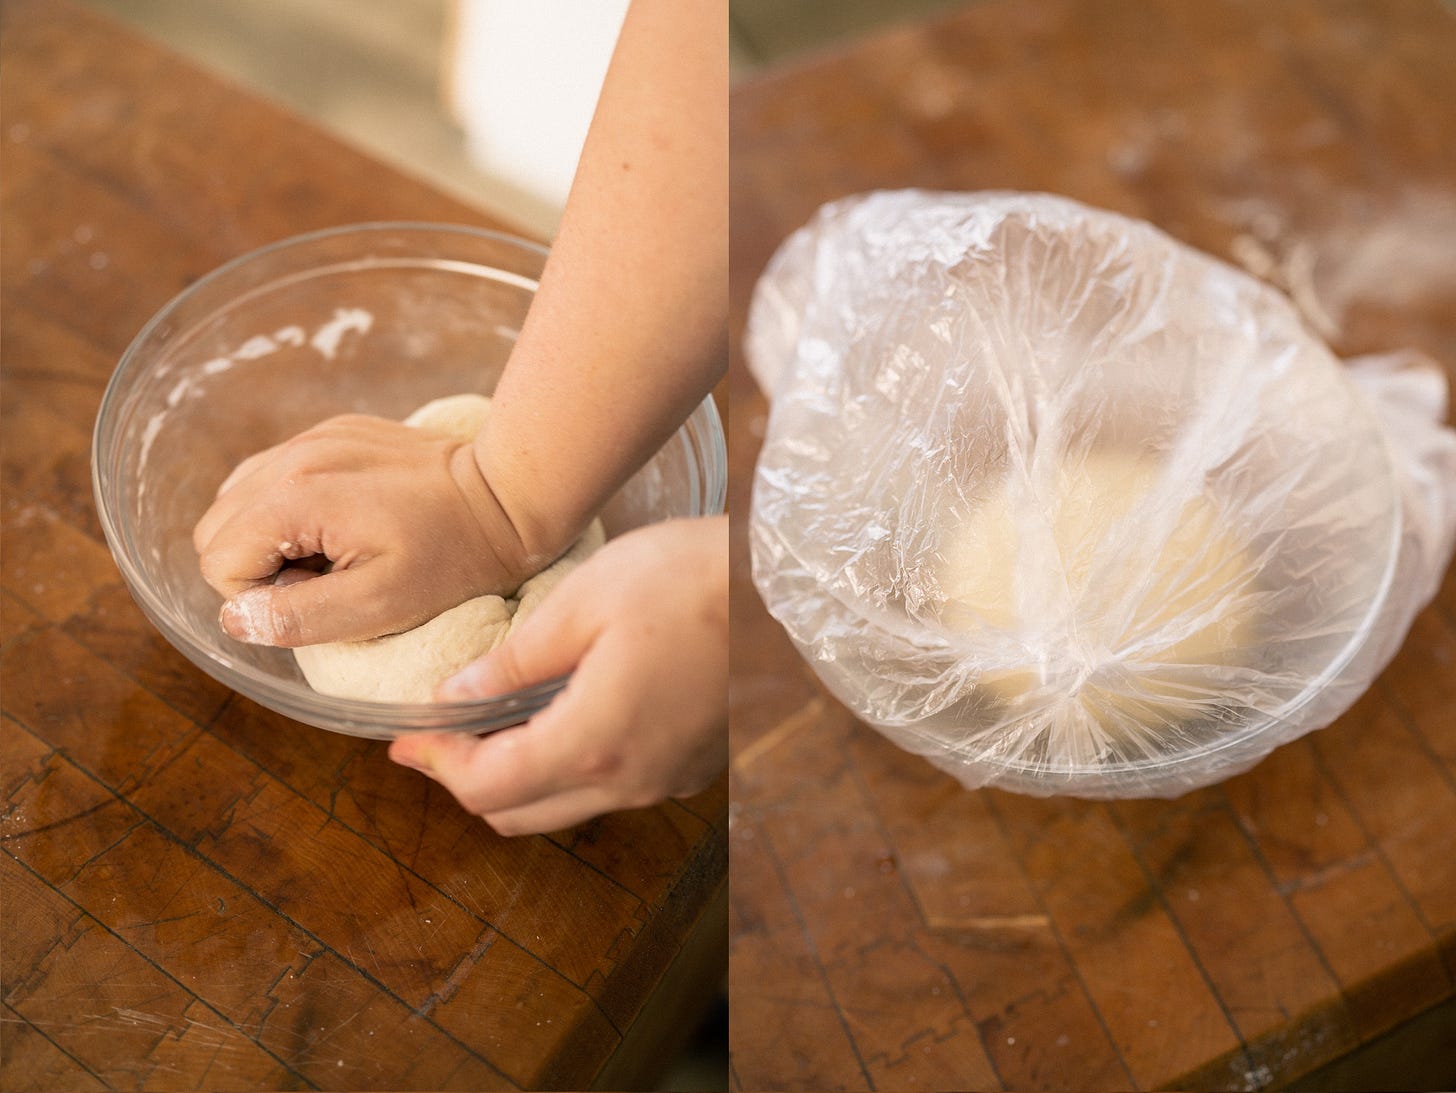
Measure flour, baking powder and salt into a bowl and stir to combine with your fingers or a fork. Next, add olive oil and water and mix with a fork or wooden spoon until the dough becomes clumpy. Now, working with your hands, try to bring the dough together into a ball by mixing, kneading, and squeezing the floury bits into the more moistened bits. Once a ball as been formed, knead dough for about 6-7 minutes until smooth, dusting lightly with flour if the dough becomes too sticky. I like to knead my dough right in the bowl to avoid making a mess of the counter. Next, cover the dough with plastic (I like to recycle an old produce bag) and allow to rest for at least 30 minutes while you prepare your filling. The dough can also be made and refrigerated up to 1 day ahead.
filling:
3 tablespoons dried currants
1 bunch swiss chard
1 bunch broccoli rabe
1 head broccoli
2 tablespoons olive oil
½ medium onion, diced
3 cloves garlic, sliced
3 tablespoons pine nuts
12 oz ricotta
2 eggs
2 grates from a whole nutmeg1
Salt to taste
Pepper to taste
First, preheat your oven to 375F and get a large pot of water on the stove for blanching your greens.
Next, soak your dried currants - cover currants by 1/2 inch with warm water and allow to rehydrate for about 10-20 minutes.
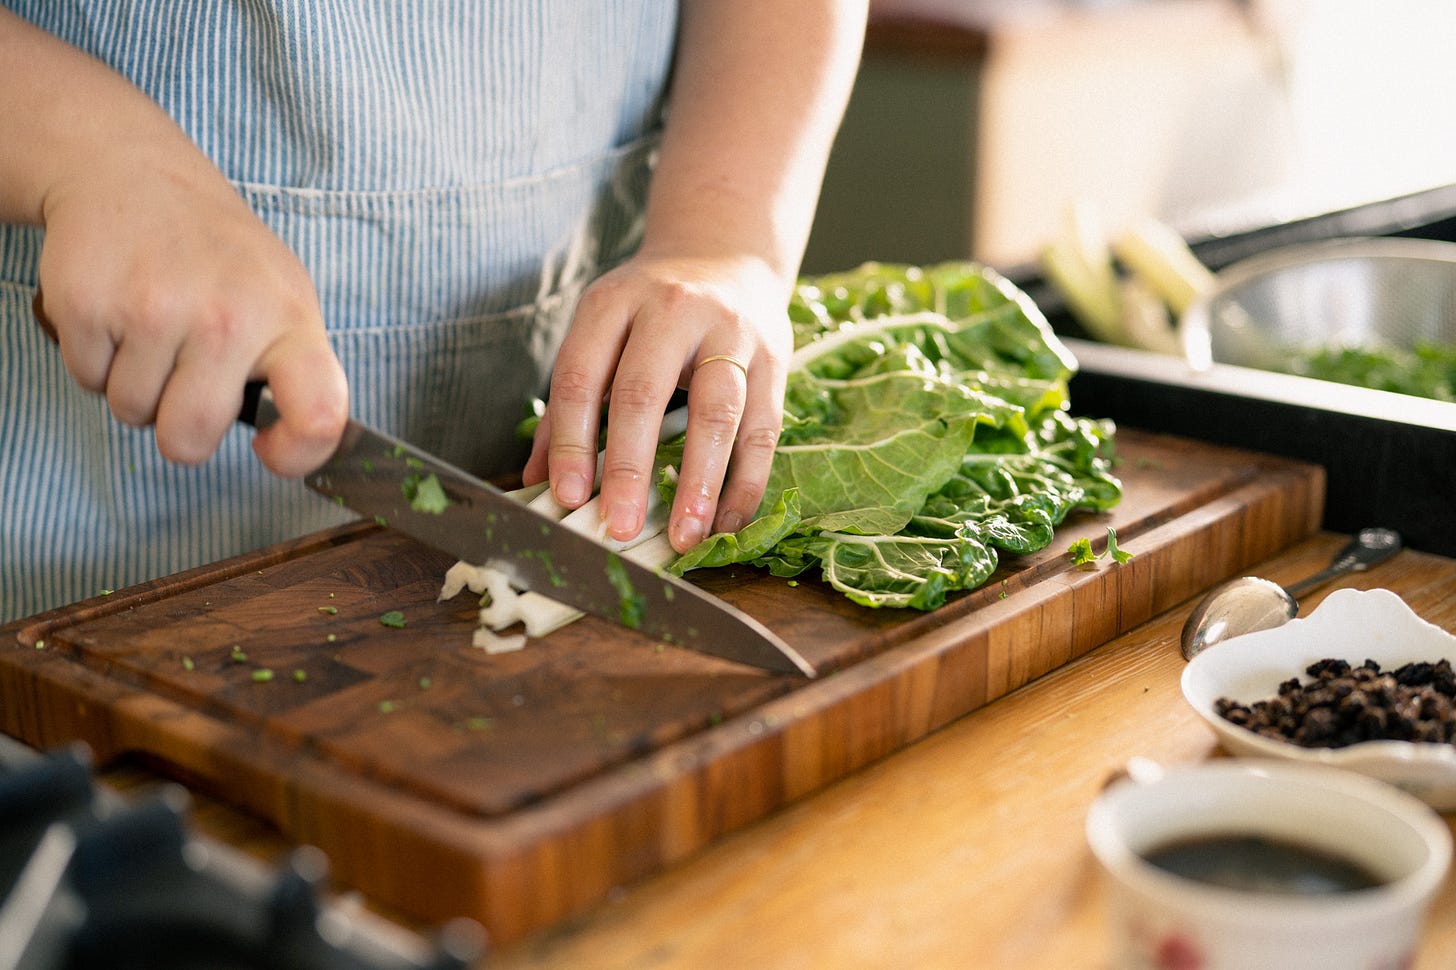
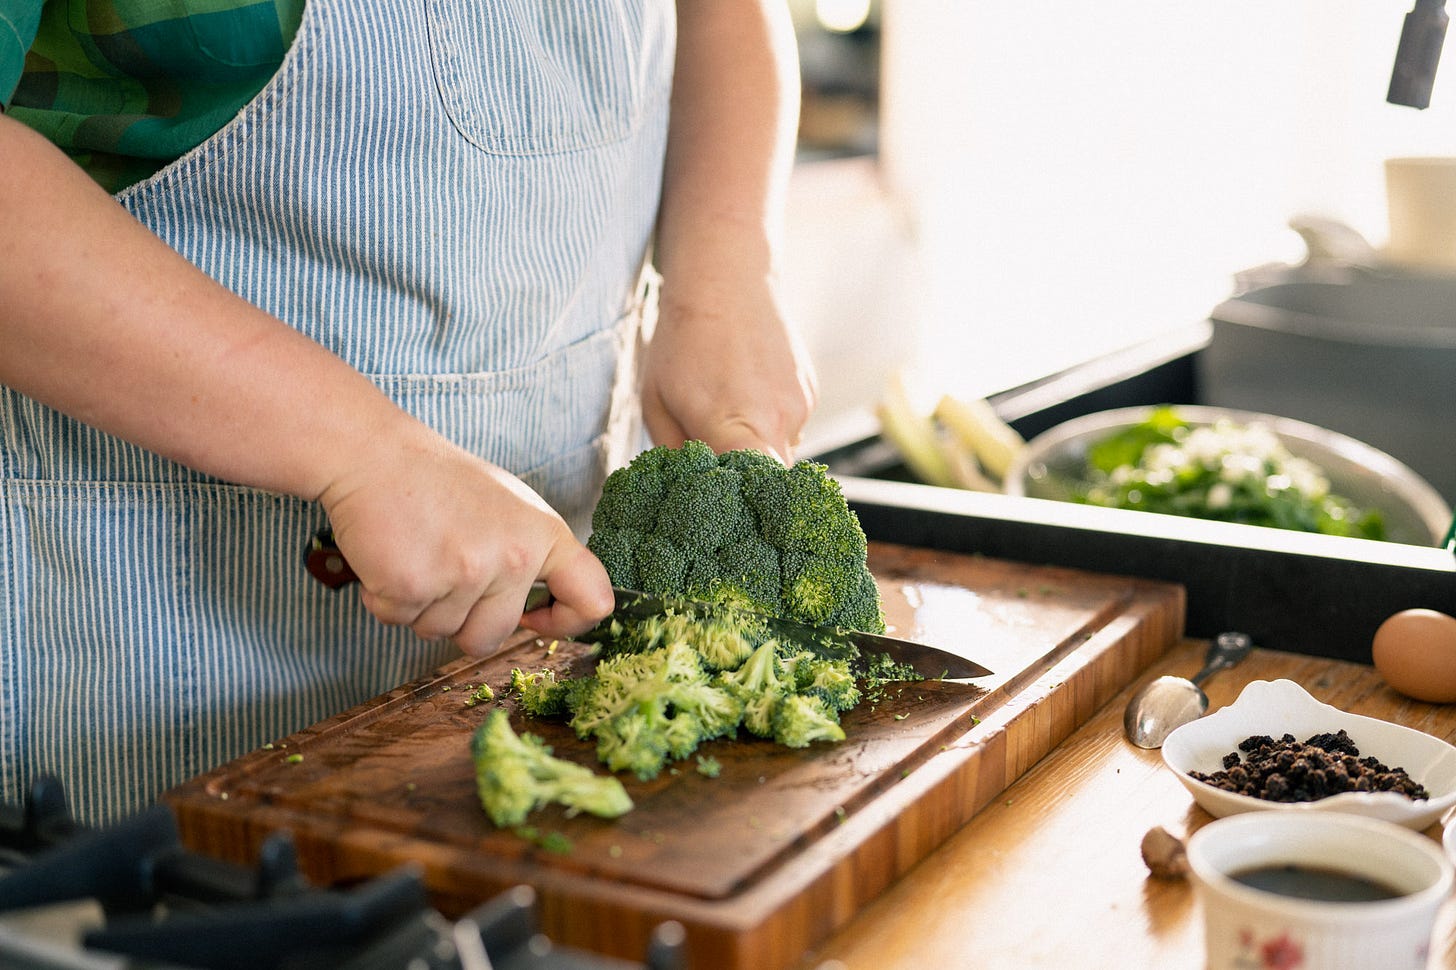
While you wait for the pot of blanching water to come to a boil you can prep your greens. Get everything washed and then rough chop into about 1/4 inch pieces. I love swiss chard and broccoli rabe stems, so slice those thin and then rough chop the leaves so you don’t have any long ribbons. For the broccoli just slice straight down the florets into the stalk. You don’t need to be too precious about it. We just want it all roughly chopped.
When your blanching water is boiling add a handful of salt. The water should taste pretty salty! Now add your greens. We are not looking for al dente here. We want the greens to get SOFT. This will take about 5-7 minutes. Don’t cover the pot with a lid or let the greens cook for too long, though, or you’ll lose their nice bright green color.
Once the greens have softened, drain them into a colander. If you have ice to spare this is a good time to make an ice bath to cool the greens quickly and set the green color, but otherwise you can just rinse the greens under cool water, then spread the drained greens onto a sheet tray to cool in an even layer.
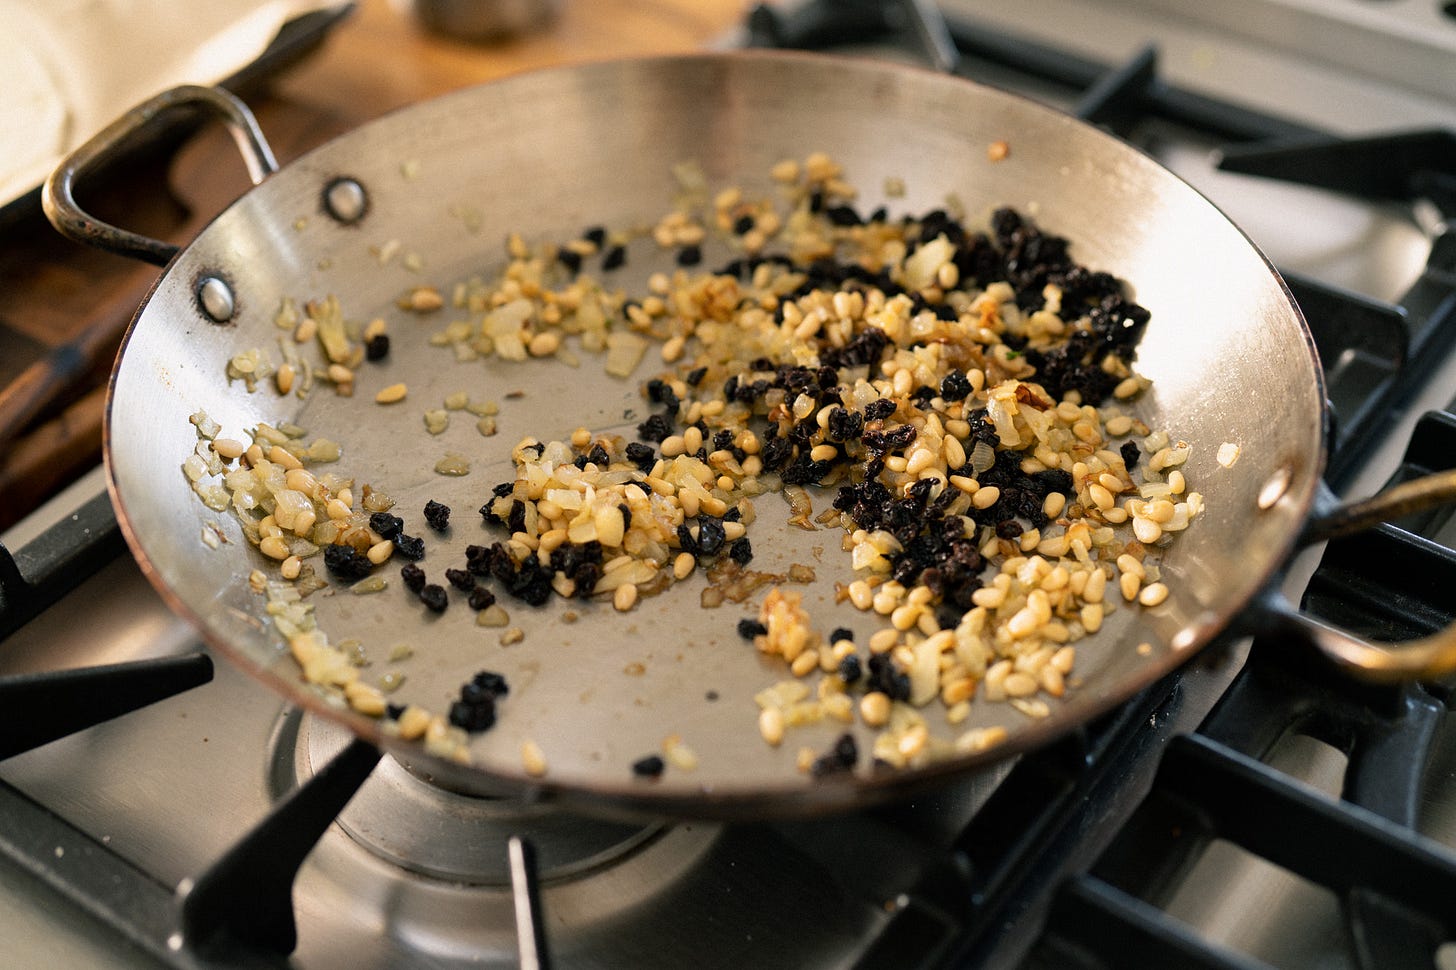
While the greens cool get the rest of the filling started. In a 12 inch skillet over medium-low heat sauté your onion in the olive oil for 6-8 minutes. We are not looking for any color here, just translucent soft onions. Season with a pinch of salt and a bit of pepper. Add pine nuts and cook for 2 minutes to toast them slightly. Add sliced garlic and cook for 30 seconds, then turn off the heat.
Drain your currants and squeeze out any excess liquid and then add the currants to the onion mix. Allow this mixture to cool.
When the greens have cooled enough to touch, form them into small balls and squeeze them super tight to drain out all the excess liquid. This step is important to avoid a soggy pie bottom.
Beat 2 eggs in a small bowl. You are going to reserve about 2 tablespoons of this mixture to egg wash the crust later. The rest will be used to help bind the filling.
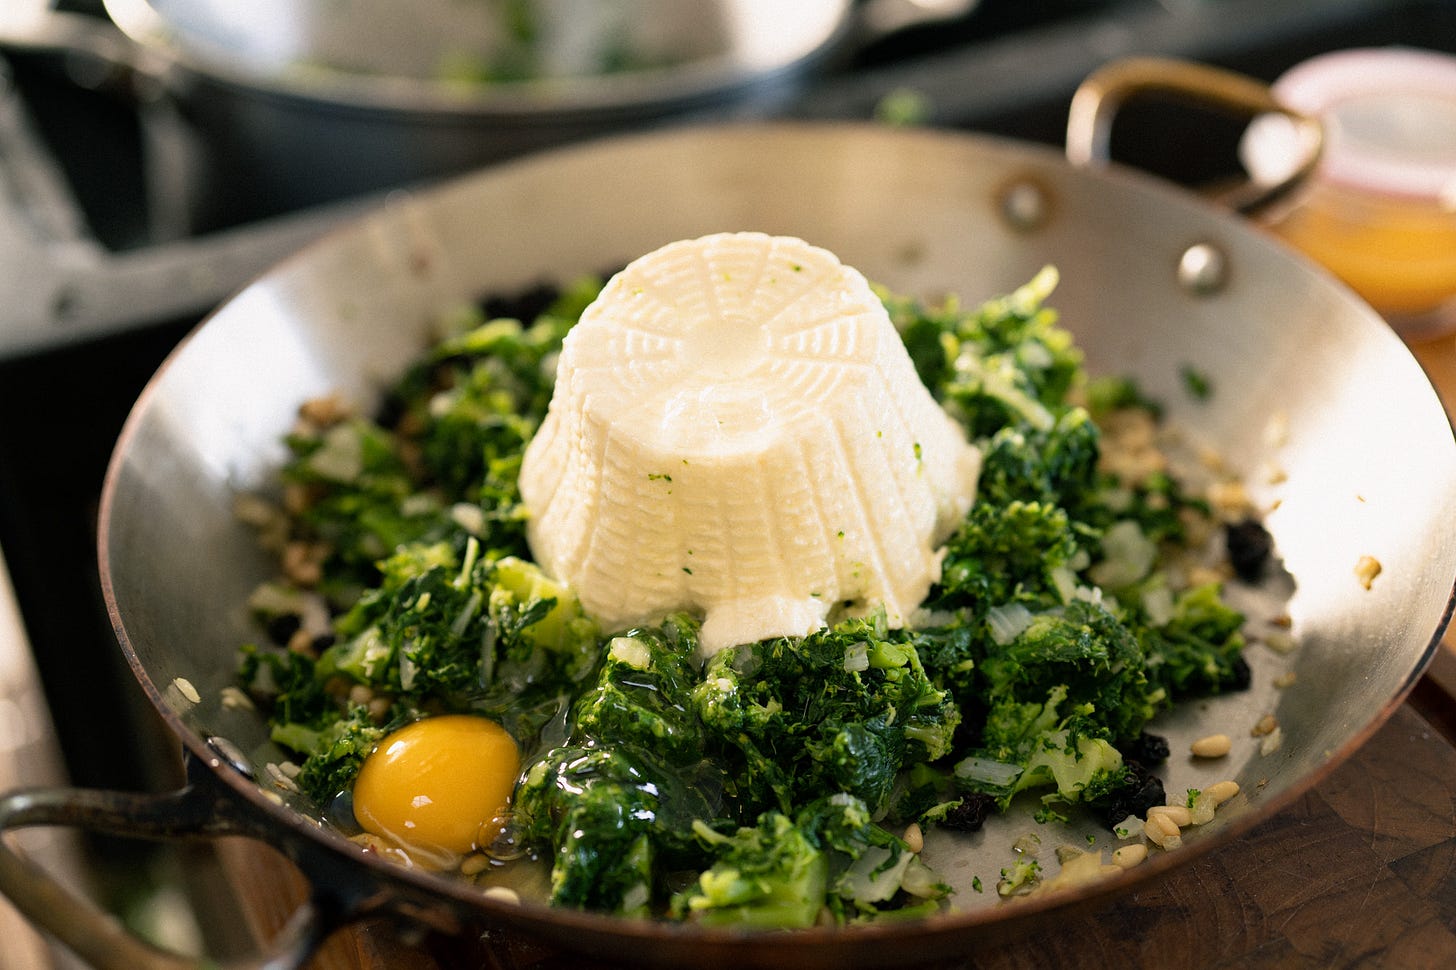
Add the greens and ricotta to the onion mixture. Now season with a couple grates of nutmeg and add about 3/4 of your beaten eggs, reserving 2 tablespoons for egg washing the crust later. Mix the filling together until well combined. It’s important to taste for seasoning - I don’t mind the raw egg but if you’re freaked out by this you can season to taste with salt before adding the eggs.
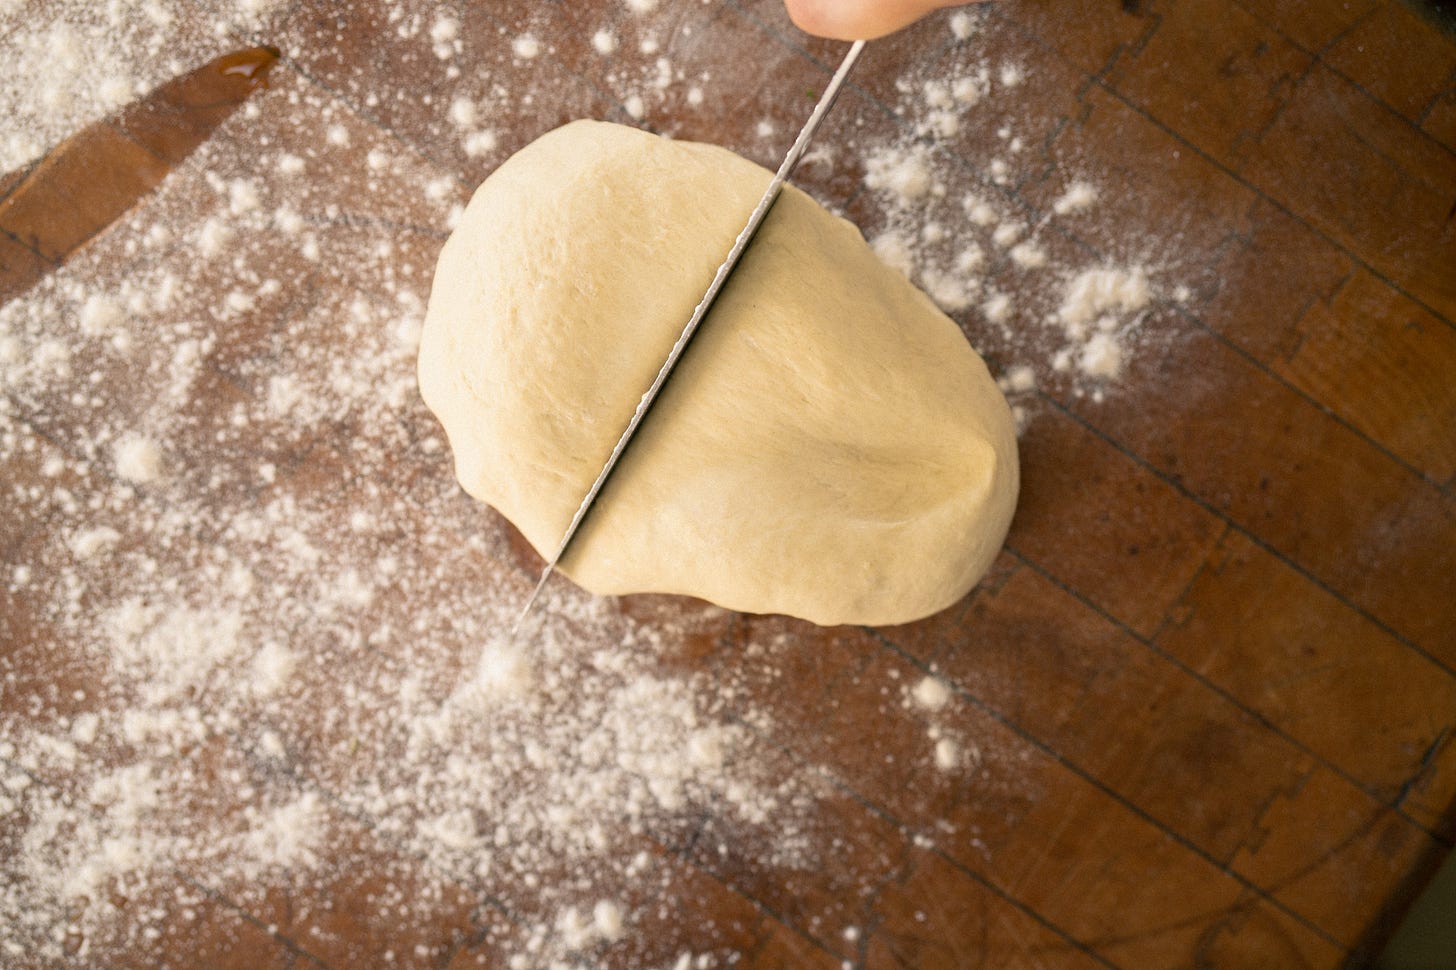
Now you can roll out your pie dough. We need a top piece and a bottom piece. The top piece should be a bit larger than the bottom because it will need to be draped over the filling. To do this, divide your dough into two pieces - one slightly larger than the other. Form each piece into a rough ball.
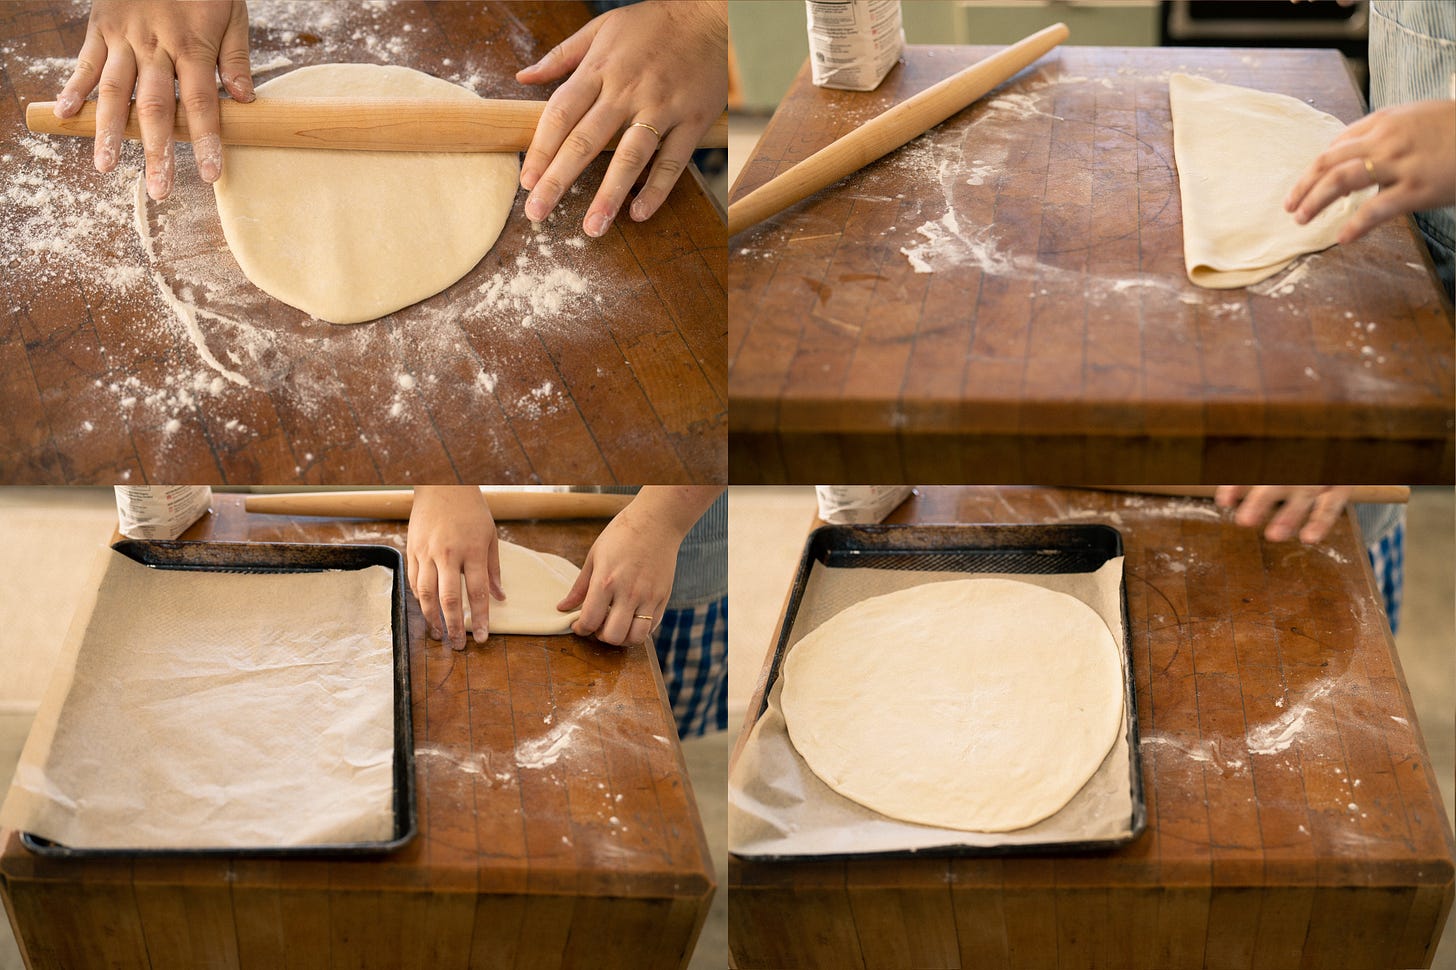
Roll out the smaller piece first. This will be the bottom crust. Cover the other piece so it doesn’t dry out.
On a lightly floured surface, roll out the dough to about 1/8 inch thick circle. It should be about the width of the sheet tray. Make sure you’re moving the dough around so that it doesn’t stick. Add more flour sparingly, but as needed to avoid sticking. Transfer bottom crust to a parchment lined sheet tray. I like to do this by gently folding the dough into quarters, then placing that on the tray, and unfolding it back to the circle.
Now move on to rolling out the second piece of dough. Same deal - lightly dust with flour, rotate often to prevent sticking and to help keep the dough in a round shape.
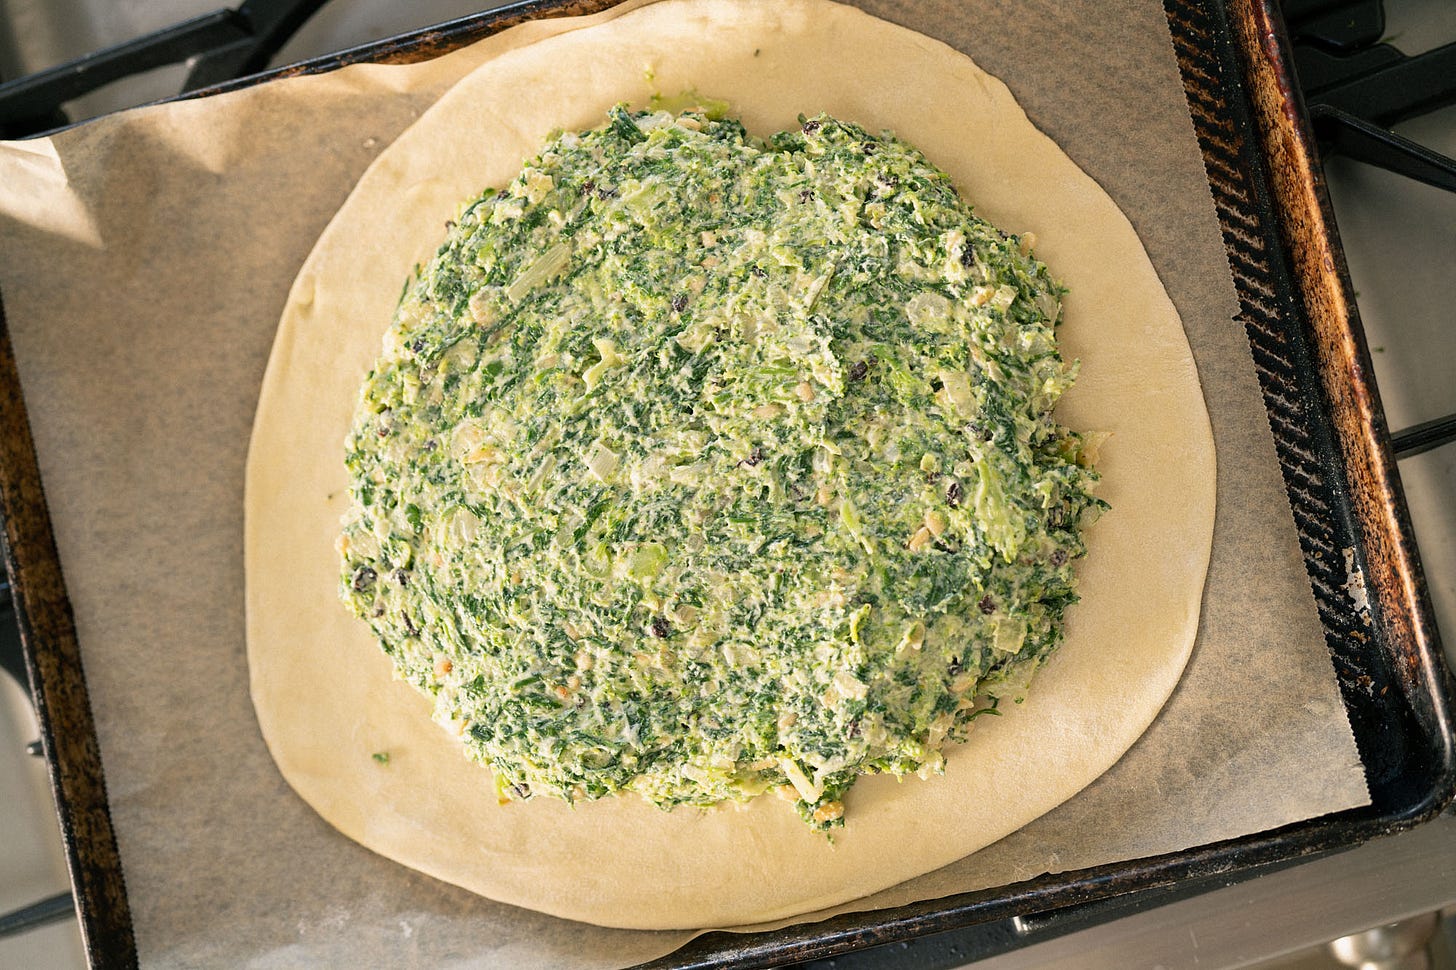
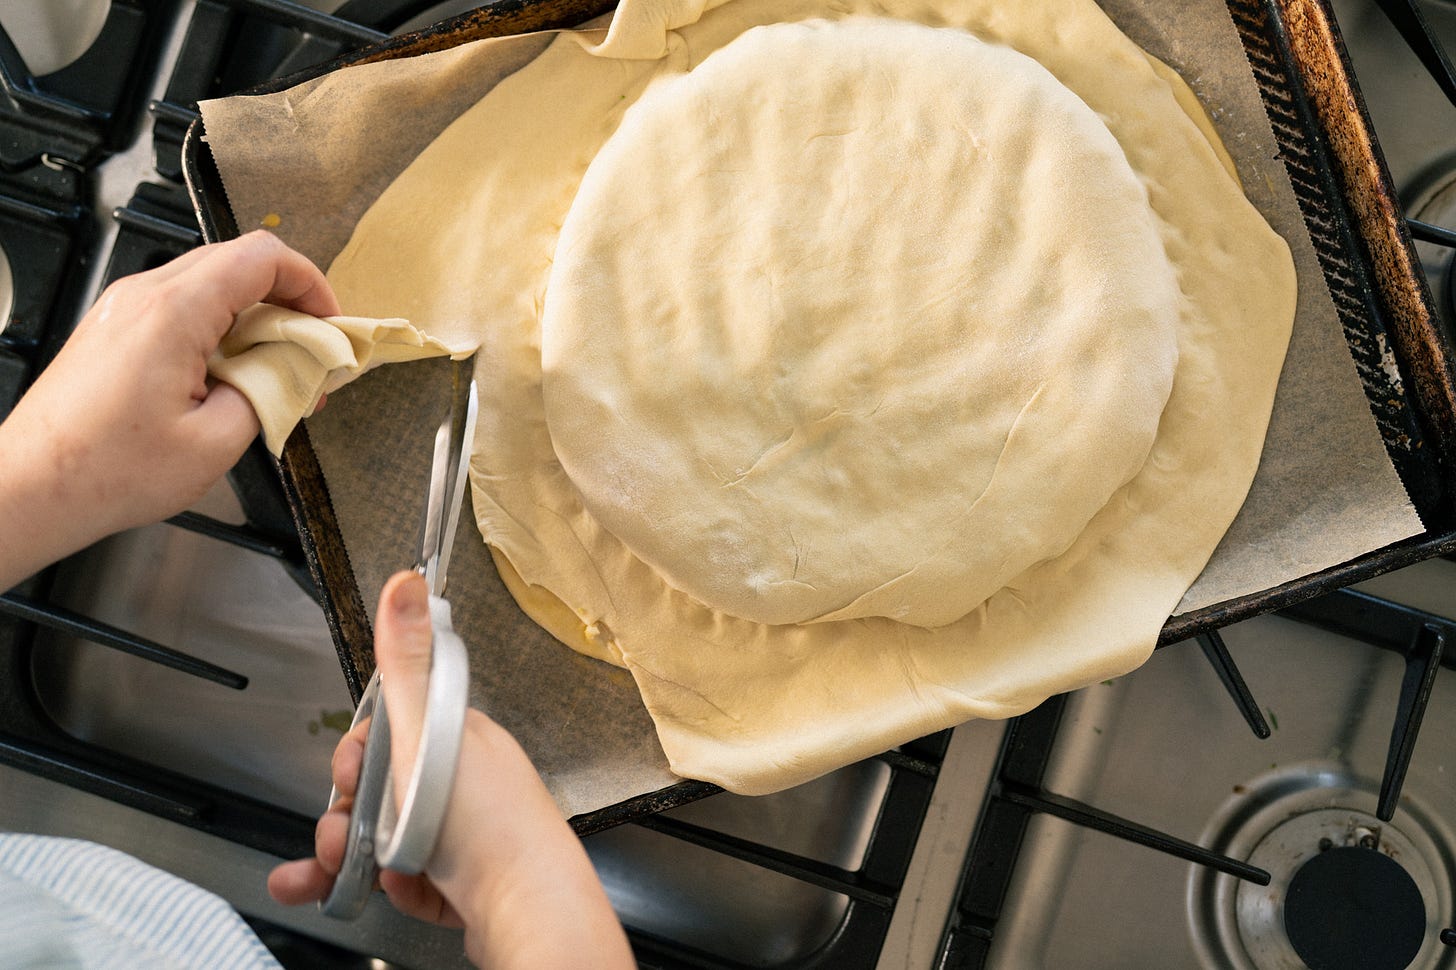
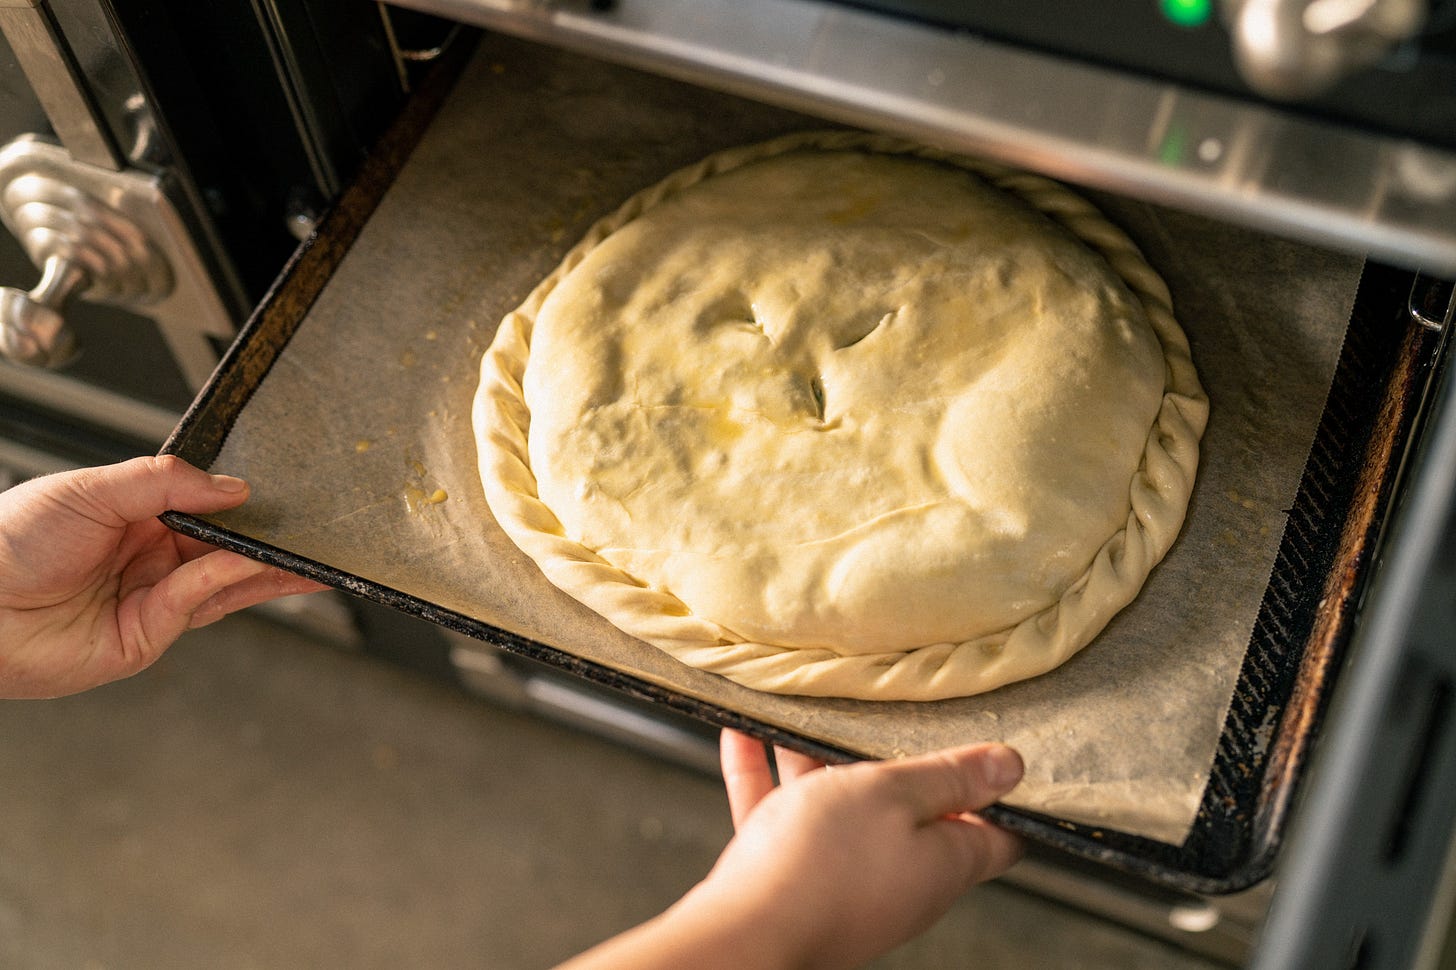
Pile your filling onto the bottom crust leaving a 1 - 1 1/2 inch rim. Shape it into a circle and flatten the top so it’s nice and neat looking. Egg wash the rim and gently place over your top crust. You can use the quarters method to move the crust from the counter to the pie. Press the top crust around the shape of the filling to get rid of any air pockets and help to create a seal. Using scissors, trim any excess dough so that you only have about 1 - 1 1/2 inch around.
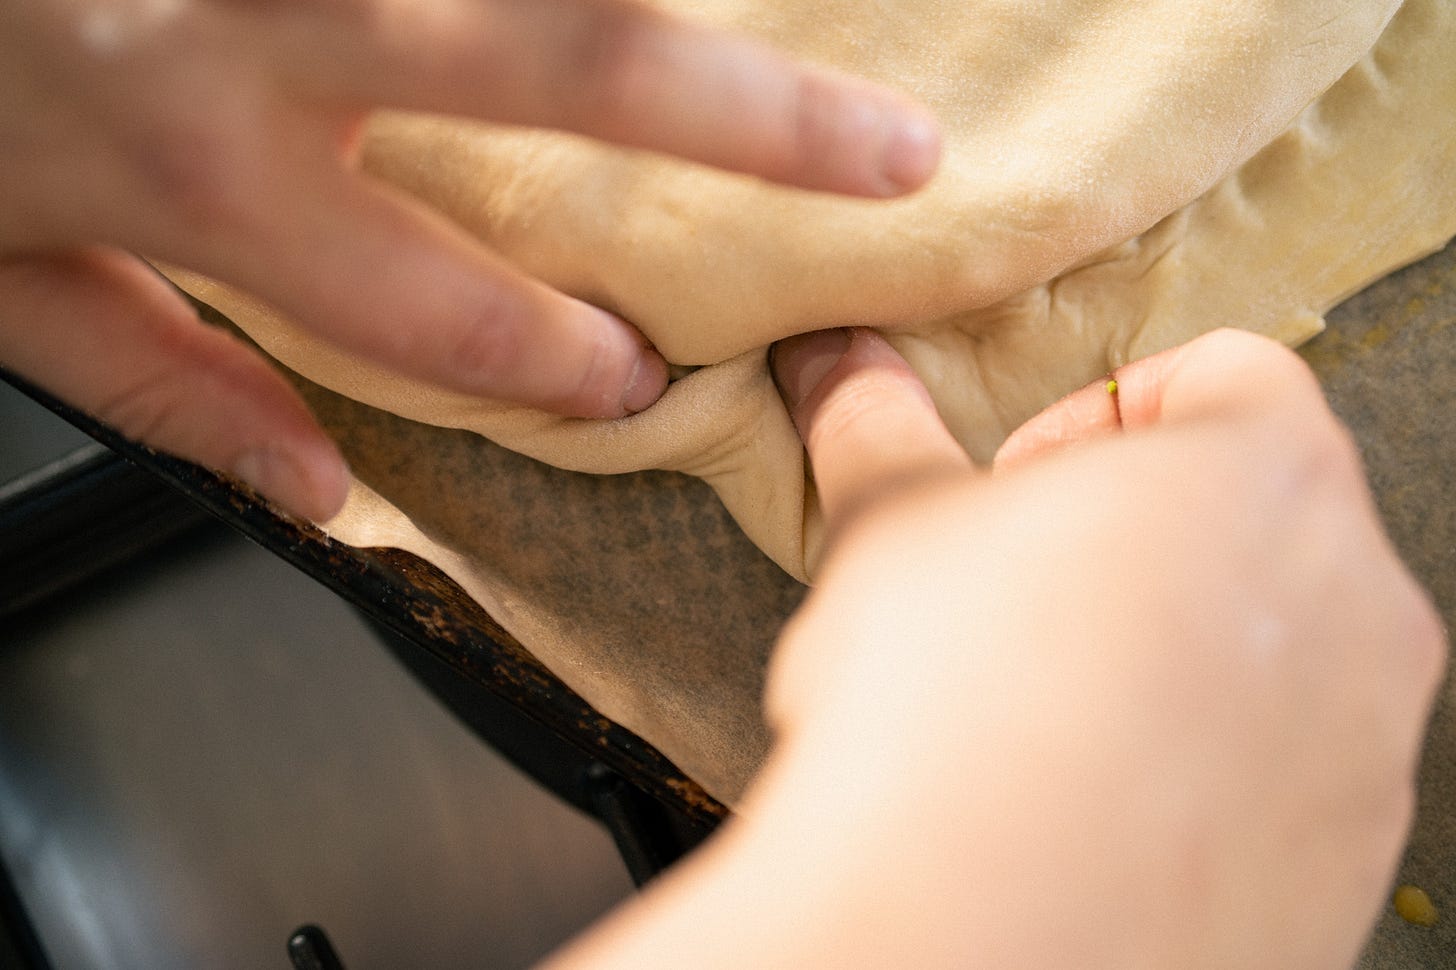
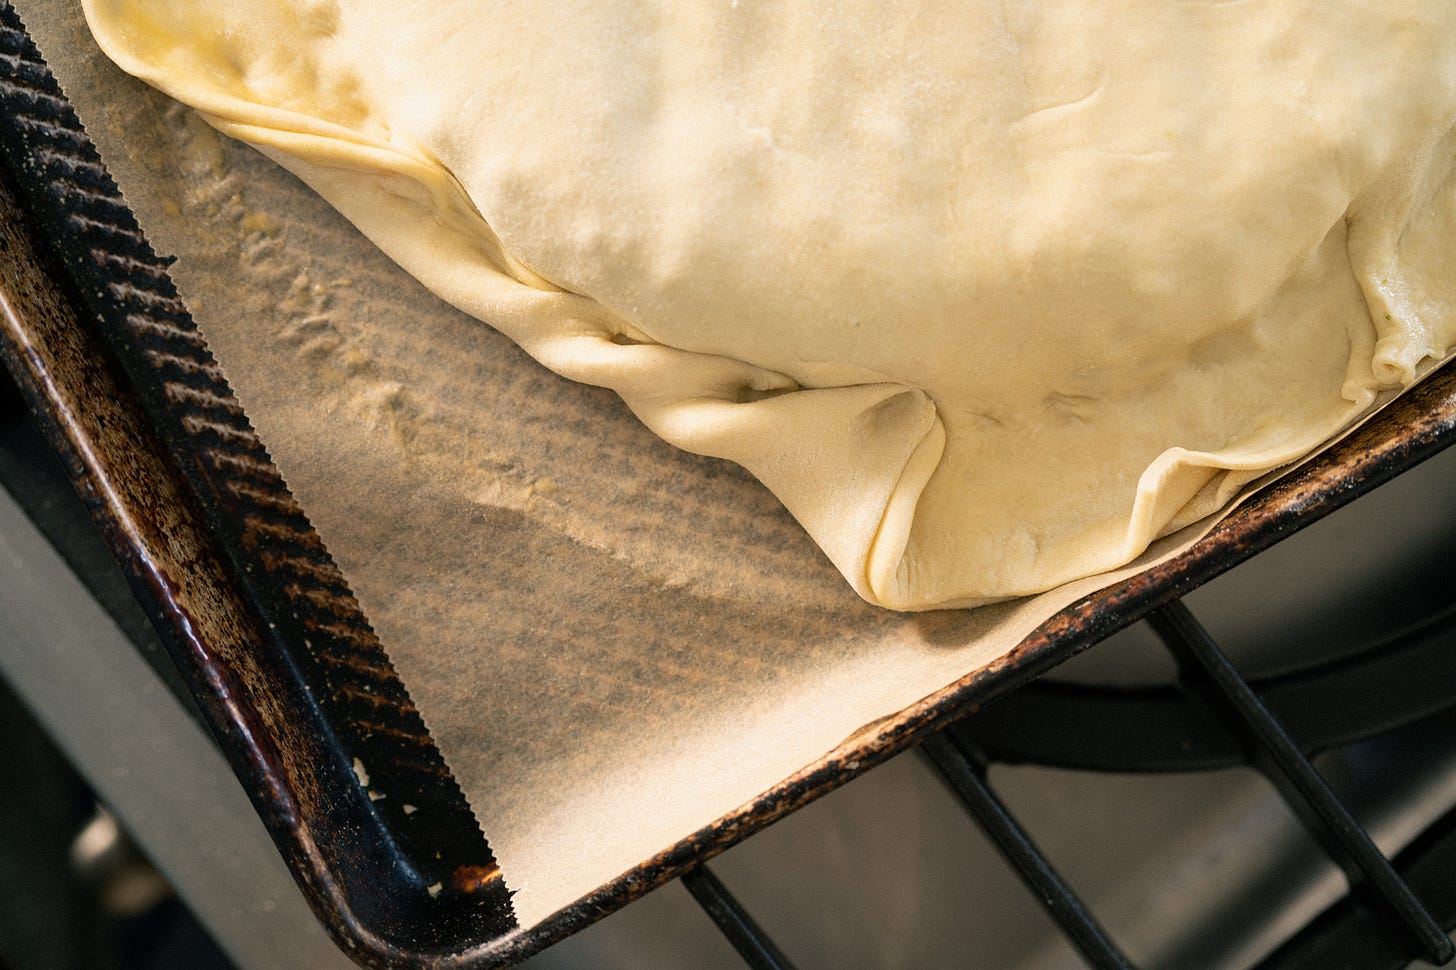
Now, you can crimp the edge however you’d like using your hands or a fork, but I like to fold it like this -
Cut a few slits on the top to let out any excess steam. With your reserved beaten egg you can now egg wash the crust.
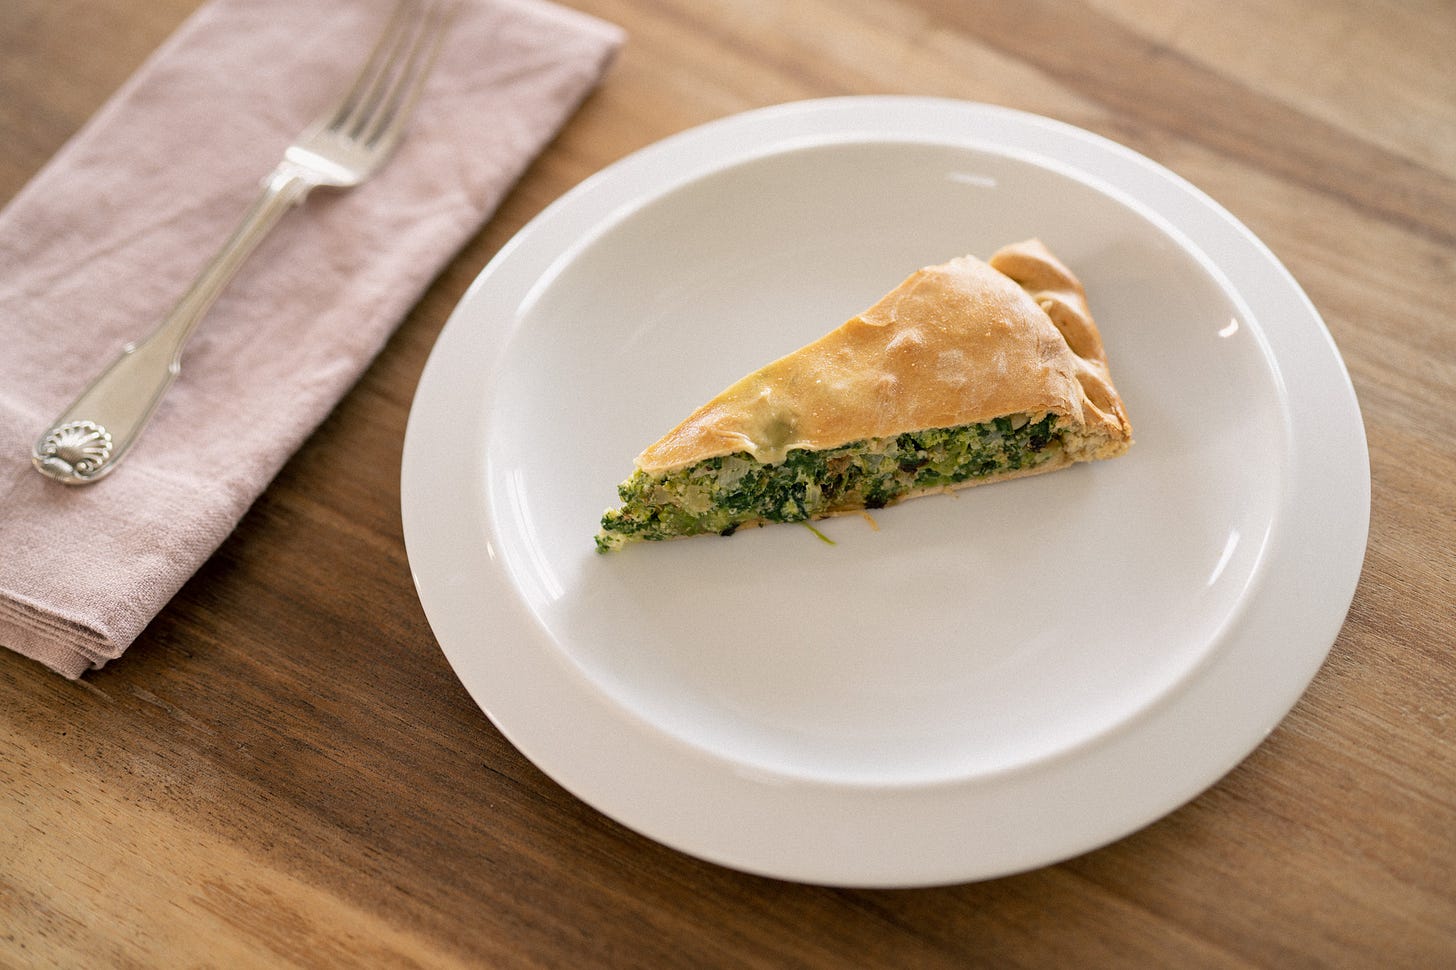
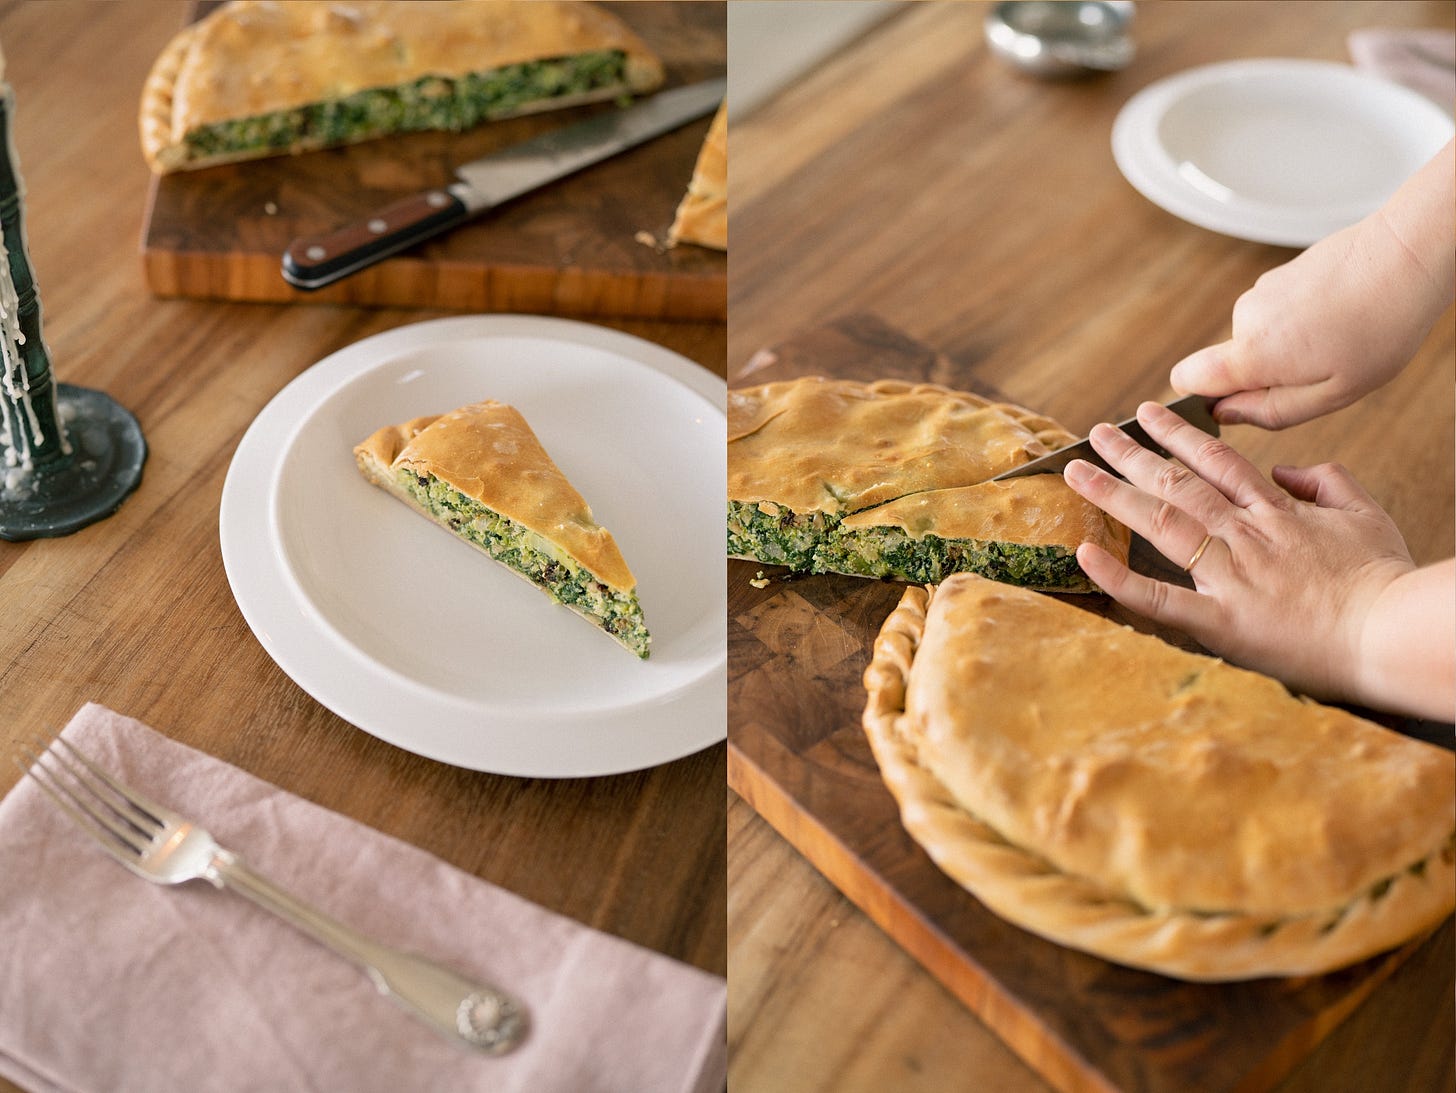
Bake in your preheated 375F oven for 30-40 minutes, rotating halfway through, until golden brown. Allow to cool for at least 20 minutes before slicing, but I prefer to eat it at room temperature. I like to eat it with my hands like a pizza.
Enjoy!
A note on whole vs. ground spices! In an ideal world we should all buy our spices whole, toast them, and then grind them ourselves, but this is clearly not realistic, even for moi! Instead, it’s helpful to understand which spices are fine to buy ground (coriander, cumin, paprika, cardamom) and which are really best whole (nutmeg, black peppercorns, fennel seeds). So yeah, I would really recommend buying a couple of whole nutmeg and grating them fresh on a microplane as opposed to using their sad and distant cousin, pre-ground nutmeg, which kind of tastes like sawdust.




Fantastic recipe. Beautiful pictures. Thanksgiving!